Sunday, September 22, 2013

Beef Pastrami

Spices for the brine

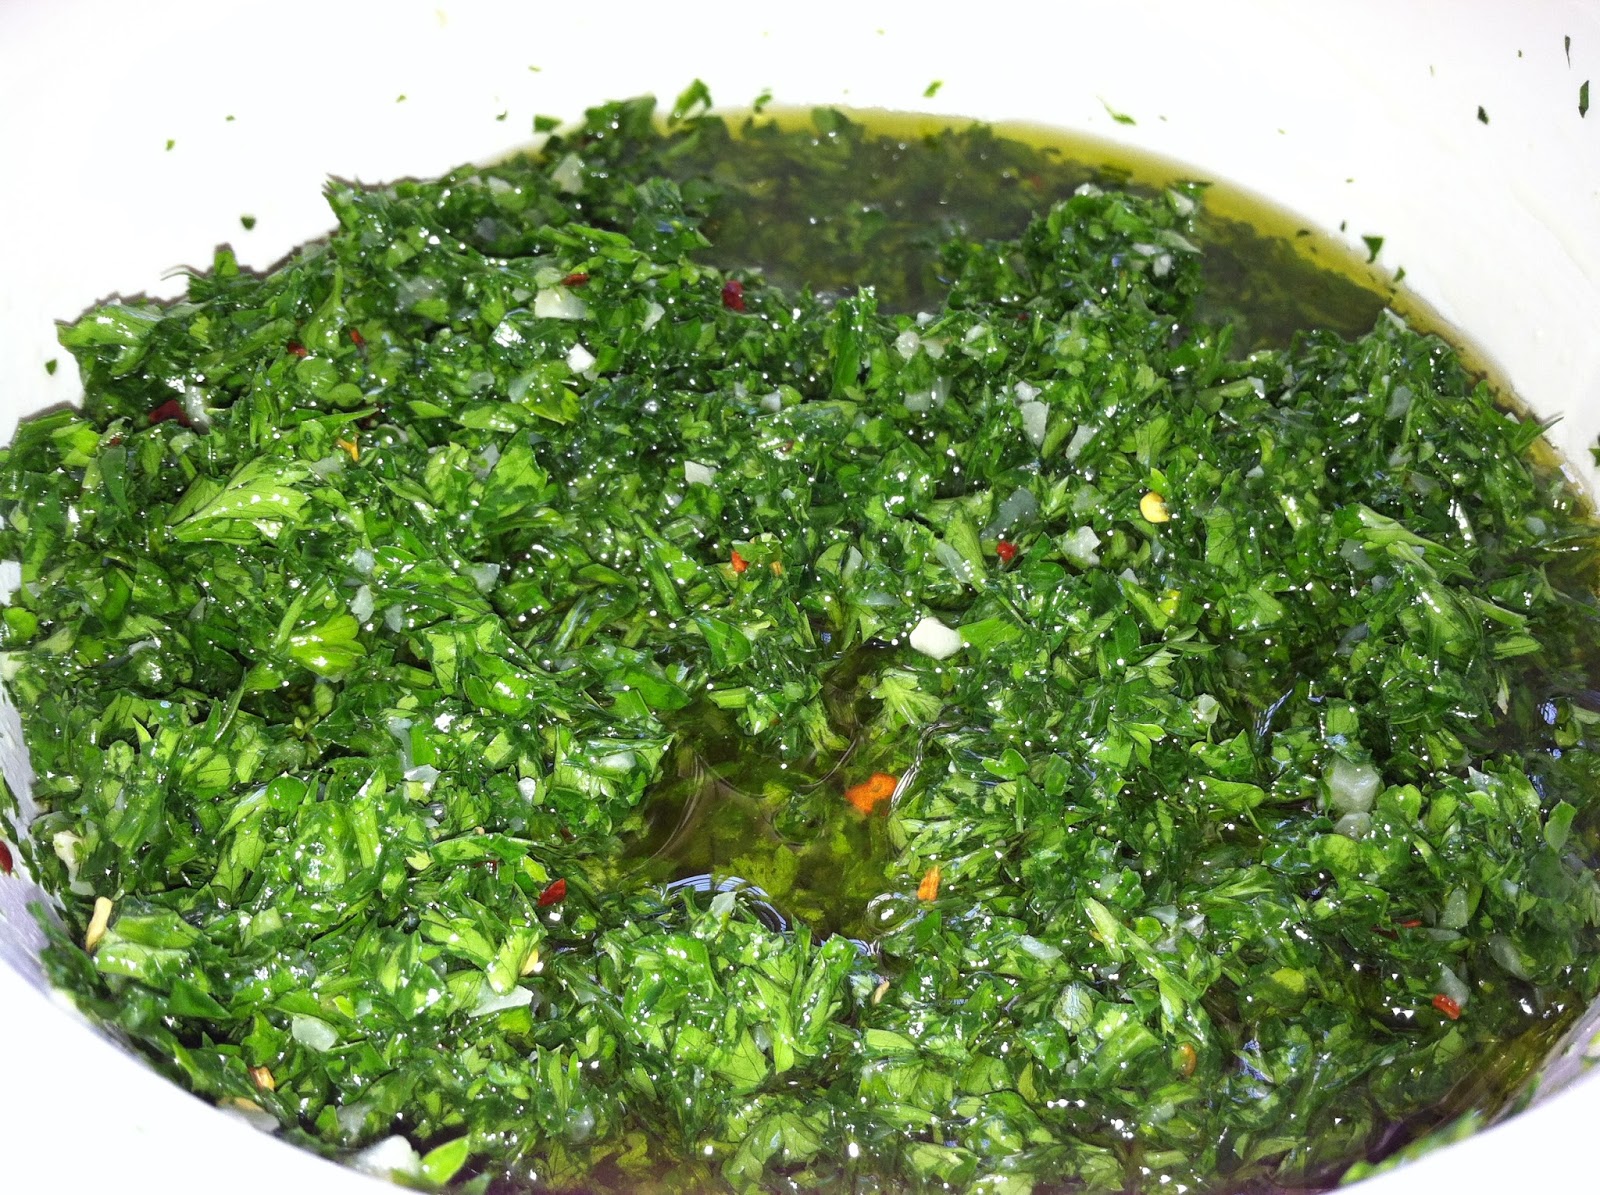
Mixing spices with the brine
Brining the brisket in a bag

Ground pepper and juniper berries

Brisket encrusted with ground pepper and juniper berries


Smoking the brisket
Getting ready to slice the brisket

Beautiful ribbons of flavorful and aromatic pastrami

Beef Pastrami


So, you may ask, “What brought this about?”  My mother-in-law did.  She knows I like to cook and make stuff (like bacon).  She asked me how long I’ve wanted to make pastrami.  I said, “Oh, a number of years now.”  I printed the recipe almost two years ago but was intimidated by the length of time involved.   When I explained that the brisket is brined for 3 weeks, smoked for 4 hours, and boiled for 2 hours, she exclaimed, “I have new respect for pastrami!”  Who would want to do this when it’s so easy to pick up a package from the grocery store or the deli?  People like you and me because we don’t just like to eat; we want to get to get to know our food at an intimate level.  We want to know how it’s made, and how it feels to make it.
This recipe is adapted from Food Network (Emeril Lagasse, 1999).
Beef Pastrami
Ingredients:
2 tablespoons black peppercorns
1 tablespoon plus 2 teaspoons dried thyme
6 bay leaves, crumbled
2 teaspoons whole cloves
¼ cup minced garlic
2 teaspoons whole juniper berries, plus 1/3 cup crushed juniper berries
16 cups (about 4 quarts) water
¾ cup packed brown sugar
¾ kosher salt
1 beef brisket (4-5 pounds)
2/3 cup coarsely ground pepper
Directions:
1.        Combine the peppercorns, thyme, bay leaves, cloves, garlic and whole juniper berries in a skillet.  Over low-medium heat and stirring constantly, dry roast until fragrant, about 1 minute.
2.       In a saucepan, over medium heat, combine the water, brown sugar and salt.  Bring it to a boil and stir to dissolve the sugar and salt.  Remove from the heat and add dry spice mixture and steep for 1 hour.
3.       Place the brisket in a glass or plastic container.  Pour the seasoned brine to cover the brisket completely.  Cover and refrigerate for 3 weeks, turning the brisket every couple of days.
4.       Preheat the smoker.
5.       Combine the crushed juniper berries and ground black pepper in a shallow dish.  Using the palm and heel of your hand, press two-thirds of the berry and pepper mixture into the brisket.  Press the remaining mixture into the other side.
6.       Place the brisket in the smoker and smoke for about 4 hours.  Remove from the smoker and cool for 30 minutes.
7.       Place the brisket in a large Dutch oven, cover with water and place over medium heat.  Bring the liquid to a boil, reduce to a simmer and cook for two hours.
8.       Remove from the pan and cool completely.  Slice into thin slices and serve.
******************
The other reason it took me so long to make this was that I could not find juniper berries.  I finally did find it at Whole Foods: $3.25 for a 0.2 oz sachet of organic whole juniper berries.  I had to buy about 7 sachets.  Hmmmm, plus about $20 for the brisket.  No wonder these deli meats are so expensive! 
Tip #1: One of the steps I added to this recipe was to dry roast the spices.  Cooking with Indian food has taught me that dry roasting spices heats the oils in the spices and enhances their flavor.  Oh, and the fragrance!  If you close your eyes you’d think you were in the middle of the spice market in Marrakesh!
Tip #2:  Whenever a recipe calls for marinating, I use re-sealable plastic bags because I can get all the air out, and the food will always be submerged/surrounded by the brine.  Be sure to double or triple the bags so that even if the first bag leaks you won’t have a mess in the fridge.  The thicker “freezer” bags work best.
Tip #3:  Crushed juniper berries?  Emeril didn’t say how to do that.  Chopping them by hand would’ve resulted in little juniper berries all over the kitchen floor.  So I used my coffee grinder like I do for my other spices.  It’s fast and the ground spices are in one space.  Since I can’t wash the grinder I clean it by grinding uncooked rice in between spices.  Juniper berries have a “piney” fragrance as they are products of conifers.  Did you know that gin is made from juniper berries?
Tip #4:  No smoker?  No problem.  I don’t have one either so I use my Weber kettle grill.  By banking the lit charcoal on one side of the grill and the food on the other side, it works just as well.  See picture above.  Again, Emeril didn’t specify what wood to use.  Since I was working with beef, I excluded apple which I use for my bacon.  I thought the mesquite might be too strong, so I decided on hickory.
Tip #5:  I refrigerated the cooked and cooled brisket overnight before slicing.  This ensured that the meat was compact making it easier to slice.
I was giddy with excitement!  I sliced the entire brisket before tasting one of the scraps – it was amazing!!  The flavor was so complex yet I was able to pick out the individual tastes of the ground pepper, juniper berries, and smoke.  It wasn’t spicy or salty.  None of the ingredients overpowered the others; it was like a symphony of flavors on my tongue!!   The pictures don't do it any justice; you just have to taste it.  And it was certainly well worth the time and effort to make this. 
Finally, what am I going to do with 3 ½ lbs of homemade pastrami?  A lot of Pastrami on Rye sandwiches for starters.
What dish have you eaten impressed you so much that you had to make it yourself?


Friday, September 20, 2013

Pork Chops and Braised Red Cabbage

                             Ingredients for Braised Red Cabbage


                                                                                                     Red cabbage, apples and sage


                                 Red Braised Cabbage


                                                                                                         Ingredients for Pork Chops


 Browning pork chops in butter


                                                                                        Stirring butter, wine, mustard, broth and cream


    Pork Chops in Mustard Cream Sauce


                                                                                                Pork Chop and Braised Red Cabbage


I know this sounds Austrian-German but I found it in my French cookbook and figured I wanted to try it.


Pork Chops with Braised Red Cabbage

Ingredients:

Braised Red Cabbage

2 tablespoons butter

1 onion, finely chopped

1 garlic clove, crushed

1 small red cabbage, shredded

1 dessert apple, peeled and sliced

1/3 cup red wine

1 tablespoon red wine vinegar

¼ teaspoon ground cloves

1 tablespoon finely chopped sage


Pork Chops

1 tablespoon butter

(4) 7-oz. pork chops, trimmed

1/3 cup white wine

1 2/3 cups chicken broth

3 tablespoons heavy cream

1 ½ tablespoons Dijon mustard

4 sage leaves


1.       To braise the cabbage, put the clarified butter in a large saucepan, add the onion and garlic and cook until softened but not browned.  Add the cabbage, apple, wine, vinegar, cloves and sage and season with salt and pepper.  Cover the pan and cook for 30 minutes over very low heat.  Uncover the pan and cook, stirring, for a further 5 minutes to evaporate any liquid.

2.       Meanwhile, heat the clarified butter in a frying pan; season the chops well on both sides.  Add the wine and stock, cover and simmer for 20 minutes, or until the pork is tender.

3.       Remove the chops from the frying pan and strain the liquid.  Return the liquid to the pan, bring to a boil and cook until reduced by two-thirds.  Add the cream and mustard and stir over very low heat without allowing it to boil, until the sauce has thickened slightly.  Pour over the pork chops and garnish with sage.  Serve with the red cabbage.

**********************

The original recipe called for clarified butter which enables you to cook it at high temperatures without burning.  You can deal with this in one of three ways:  1) clarify the butter yourself by skimming the fat off while heating in a pan; 2) buy it (ghee in Indian grocery stores); or, 3) forget about it and just use regular butter.  Just keep an eye on it to make sure it doesn’t burn.

The braised red cabbage is of course reminiscent of sauerkraut but it was more sweet than sour.  Sautéing it in butter removed any trace of bitterness from the cabbage, and added silkiness.  Although it was shredded, there was texture and a little of bite.  It was also very pretty next to the pork chop.

The pork chops were very tender.  Some people may be put off by the cream sauce but it really was just a nice touch.  It wasn’t too creamy or heavy, and the butter, mustard, wine, broth and cream blended so well together my family could not figure out what was in the sauce!  My daughter who is a little finicky even dipped her bread in the extra sauce. 

Overall, these two dishes were excellent and will definitely be seen on our table again!  So, how do you cook your pork chops?


Tuesday, September 17, 2013

Chicken Chasseur

Ingredients for Chicken Chasseur

Mushrooms sautéing with shallots

Chicken simmering in roux, mushrooms, wine, stock, tarragon
Chicken Chasseur with Broccoli and French bread


Chasseur means “hunter” and is used for dishes including mushrooms, shallots, tomatoes, wine and brandy.  This dish was probably named when hunters cooked game they had shot or captured with mushrooms foraged in the woods and herbs gathered nearby.


Chicken Chasseur

Ingredients:

1 3 ½ lb chicken, or chicken parts

1 tablespoon oil

4 ½ tablespoons butter

2 French shallots, finely chopped

¾ lb button mushrooms, sliced

1 tablespoon all purpose flour

½ cup white wine

2 tablespoons brandy

2 teaspoons tomato paste or 2 cups chopped tomatoes

1 cup chicken stock

2 teaspoons chopped tarragon

1 teaspoon chopped parsley


1.        If using a whole chicken, divide into 8 pieces. 

2.       Heat the oil in a frying pan or saucepan and add half the butter.  When the foaming subsides, add the chicken and sauté in batches on both sides until browned.  Lift out onto a plate and keep warm.  Pour the excess fat out of the pan.

3.       Melt the remaining butter in the pan, add the shallots and cook gently until softened but not browned.  Add the mushrooms and cook, covered, over moderate heat for 3 minutes.

4.       Add the flour and cook, stirring constantly, for 1 minute.  Stir in the white wine, brandy, tomato paste and stock.  Bring to a boil, stirring constantly, then reduce the heat and add the tarragon.  Season.

5.       Return the chicken to the pan, cover and simmer for 30 minutes, or until the chicken is tender and cooked through.  Sprinkle with parsley to serve.

*************************

Inspired by my friend, Ray’s, fondness for all things French, I looked for a simple recipe that I could make on a weeknight. 

It was indeed simple, and the ingredients were readily available.  I love the use of fresh herbs which I get from my garden.  You can serve this dish with crusty bread or make your own croutons by gently frying crustless pieces of bread in oil until golden brown.  This dish goes well with country red wine from Southwestern France. 

So when are you going to make this dish?

Thursday, September 12, 2013

Birthday Luncheon

Corn Salad

Quinoa Salad
Grilled Vegetables

Grilled Mahi-Mahi


Grilled Mahi-Mahi and Tri-Tip topped with Chimichurri


Marie's Carrot Cake


Last Sunday I celebrated by 50th birthday. I wasn’t apprehensive about it or depressed that I had hit the half-century mark. It was another milestone. When my father turned 50 I remember saying to him, “Now you’re a half century old!” At first I wasn’t going to do anything about it, just celebrate with my family. But then I decided that this is indeed something to celebrate about. My baby brother passed away last December, and he was only 40. So I created a little menu and invited my family (sans my in-laws who are out of town) and my closest friends, and we got together for lunch.


This is what we had:


Chips – Just regular Ruffles potato chips. I almost always serve chips to tide people’s hunger over while waiting for all of the dishes to finish cooking. It’s easy to grab and satisfies the craving for salt and crunch when I’m hungry. Besides, I think of this as a treat as I don’t store this in my kitchen because of the calories.


Deviled Eggs – This is a dish I inherited from my mother-in-law. Call it a throwback from the 50s or 60s but I believe it lends an elegance to the buffet table. This is easy to make and oh-so-addictive. The day before your event boil eggs for about 10 minutes and cut in half. Place the whites in a rimmed platter and the yolks in a bowl. Mash the yolks with a fork or pastry cutter, add mayo, yellow mustard and white pepper. Mix until creamy and transfer to resealable plastic bag. Refrigerate overnight. To serve, place egg whites on a Deviled Egg tray, thick side pointing out (for ease of picking up). If you don’t have a Deviled Egg tray, place some shredded lettuce on a platter and lay egg whites on top. This will prevent the deviled eggs from sliding around. Snip off a piece of one of the bottom corners from the resealable plastic bag and pipe egg yolk mixture into the whites. Sprinkle paprika on every other egg.


Pedron Peppers – These are mild peppers I picked from my garden. Similar peppers are Cubanelles or Italian Frying Peppers. They are mild but once in a while you’ll get a spicy one. I liken eating these to playing roulette.


Roast Tomato Soup – One of the best things I’ve ever made! This was a good prelude to the food to come as each guest was handed a mug of warm (not hot) tomato soup which I garnished with cream and a roasted grape tomato. For pictures and the recipe, please see my post “Roast Tomato Soup” (8/31/13).


Quinoa Salad – One of my favorite new foods. Quinoa is believed to have originated in the Peruvian Andes. Although it looks and be haves like a grain, it is actually related to spinach and tumbleweeds! Nevertheless, it is rich in protein and is easy to cook. When it’s cooked it seems that the ring holding the two halves together fall off. I mixed red and white and added diced beets from my garden, sliced olives, minced red onion, cucumbers, diced orange bell peppers, fresh thyme, and capers. Kosher salt and freshly ground pepper were all I used to season this dish.


Corn Salad – I usually don’t make this but I thought it would add to the table. It certainly was colorful! First I roasted the corn (in their husks) in the oven, then I shucked them cutting as close to the cob as possible. I added diced red bell peppers, black beans, diced carrots and celery, basil leaves and minced flat leaf parsley. You can dress it with your favorite brand of Italian dressing.


Grilled Veggies – This is a standard whenever I BBQ or grill anything. It’s a great accompaniment to the meat and a good alternative for vegetarians. All I do is mix garlic salt and oil in a large bowl and toss the vegetables in it. Grilling veggies gives them a delicate smoky flavor and an attractive char. So for my birthday, we grilled zucchini, green beans tomatoes and portabella mushrooms.


BBQ Tri-Tip – I like to serve this for a crowd. It cooks in about an hour, is pretty lean and has lots of beefy flavor. When sliced thin and at an angle, it comes out very tender. Be sure to let the meat rest for about 10 minutes after removing from the grill to let the juices redistribute.


Grilled Mahi-Mahi - My mom doesn’t like to eat a lot of red meat so I always try to have something else for her. As with the veggies, I used the garlic salt-oil mixture to season the fillets. The oil also prevents them from sticking to the grill. Just grill the fillets until they are opaque to preserve their tenderness, otherwise, they come out dry.


Chimichurri – And finally my go-to condiment for grilled anything. Please see my post “Chimichurri” (9/6/13) for details.


Carrot Cake – Carrot Cake is my favorite kind of cake since it provides the sweet finale to a meal, as well as contributes to the DRA (Daily Recommended Allowance) of fruits and vegetables! So my sister-in-law, Marie, said she was going to take care of the cake. She made one. But this was no ordinary cake! It was chock-full of candied pineapples, coconut flakes, nuts, hand-shredded carrots, raisins, etc. She also used my Apricot Jam and Apricot-Banana Jam.


*************************


As we were enjoying the food, I was already thinking of what to make for the next party. I also made a mental note to add marinated artichoke hearts or hearts of palm to the Corn Salad.


My friend, Ray, also brought his World Famous Macadamia-Crusted Pear Tart which was devoured within minutes of slicing. You need to bring more next time, Ray!


It was a wonderful gathering. My family and friends asked God to bless me, and in turn I thanked God for them. Despite my protests, Mary insisted that I make a wish and blow out a candle. So I wished for success in my future endeavors.


Would you like me to cook for your birthday?


Wednesday, September 11, 2013

New Blog

Hello friends!

Sorry for being absent for several days.  I've been working on our forum and as you can see we have a new blog!  What was www.kitchencando.blogspot.com is now www.hummingbirdhillkitchen.blogspot.com.  I've asked my niece, Abi to help me spruce it up and enable more features.  She's so smart!

The change is primarily to reflect the direction of this blog.  Over the course of the next few weeks you will see a new banner, more features, new recipes, as well as more posts regarding Hummingbird Hill Jams.  I don't want to spoil the surprise so I'll stop here.  Check back often, and as always I welcome your comments.

Remember, food bridges people!

Friday, September 6, 2013

Chimichurri

Chopped parsley, oregano and garlic

Salt, white wine vinegar, olive oil and pepper flakes


Prepared Chimichurri


One of my favorite go-to condiments is Chimichurri.  This is an Argentinean sauce made from herbs, oil and vinegar, and is always served alongside grilled meats.  This sauce is vibrant both in taste and appearance.  No need for extraneous rubs or marinades.  Chimichurri enhances the flavor of meat cooked over an open fire with its herbaceousness that brings to mind the grass that the steer was raised on.
 
Chimichurri
 
Ingredients:
1 cup firmly packed fresh parsley, trimmed of thick stems
3-4 garlic cloves
2 tablespoons fresh oregano
½ cup olive oil
2 tablespoons red or white wine vinegar
1 teaspoon sea salt
¼ teaspoon red pepper flakes
 
1.        Finely chop the parsley, oregano and garlic, or process in a food processor.  Transfer to bowl.
2.       Stir in the olive oil, vinegar, salt and red pepper flakes.  Adjust seasonings.
3.       Serve immediately or refrigerate.  If chilled, return to room temperature before serving.  May keep refrigerated for 1-2 days.
 
***************************
I first had Chimichurri years ago when some co-workers and I went to an Argentinean restaurant for lunch.  I ordered sweetbreads and they ordered other grilled meats.  All of the tables had bowls of this bright green sauce.  I didn’t care much for the sweetbreads but I fell in love with the sauce!  It was good on everything – even bread.  So we looked on the internet and found several versions.  Some ditched the oregano, some had other herbs.  But the one constant ingredient is the parsley.  As with most recipes, you can personalize this by adjusting the vinegar or the pepper flakes.  But no matter how you make it, it will be good.  Chimichurri wakes up the flavor of anything you dip in it.
What would you dip in Chimichurri?

Tuesday, September 3, 2013

Hong You

Ingredients for Hong You

Sichuan peppercorns


Chile de arbol

Crushed ginger, garlic and cinammon

Combining soy sauce and sugar mixture with pepper mixture


Spices cooking in the oil.

Oil and spices poured into bowl with peppers.

Letting Hong You cool in bowl.

Hong You ready for storage.


I love spicy food and I constantly look for new sources of heat.  So when my March issue of Saveur came I was elated to find that one of the feature articles was about Sichuan food.  I have long heard of this spicy cuisine of China, and have eaten Mapo Tofu many, many times.  I also make Spicy Eggplant often.  But this article by Matt Gross gave so much information, and better yet, mouth-watering recipes.  An important ingredient in most Sichuan dishes is Hong You which I was very eager to make.
 
Hong You (Sichuan Red Chile Oil)
INGREDIENTS
2 cups canola oil
4 star anise
3 cloves garlic, smashed
3 cao guo or black cardamom pods
3 whole cloves
2 bay leaves
1 stick cinnamon, broken in half
1 3" piece ginger, smashed
1 cup (about 32) chiles de árbol, stemmed and chopped
3 tbsp. Sichuan peppercorns
1 tbsp. light soy sauce
½ tsp. kosher salt
INSTRUCTIONS
Heat oil, star anise, garlic, cardamom, cloves, bay, cinnamon, and ginger in a 2-qt. saucepan over medium heat; cook, stirring occasionally, until garlic is golden, 15–20 minutes. Transfer to a 1-qt. glass jar with chiles, peppercorns, soy, and salt; let cool to room temperature. Using a slotted spoon, remove and discard garlic and ginger; seal jar and let sit at least 24 hours. To use, strain oil, discarding solids. Store refrigerated up to 3 months.
 
*******************
 
Let’s talk about the ingredients.  Garlic, cloves, bay leaves, cinnamon stick, ginger, chile de arbol and soy sauce are pretty easy to find; most grocery stores carry them.  That leaves only the black cardamom pods and Sichuan peppercorns. 
I’ll be honest with you – I couldn’t find the black cardamom pods.  I live in the Los Angeles area and have easy access to vast numbers of Asian grocery stores but I didn’t find it.  The store employees didn’t know what “black cardamom” was, and I was probably mispronouncing “cao guo”.  Not wanting to delay trying the recipe any longer, I used green cardamom.  I later learned that “cao guo” is one of two kinds of black cardamom.  The smaller variety is used in Indian and Pakistani dishes, mainly in sweets.  The larger of the two, cao guo, is used in Chinese and Vietnamese dishes.  This one has a smoky aroma and flavor because it is dried over an open flame. 
The Sichuan peppercorn is not even remotely related to peppers.  In fact, it is the dried rinds of tiny fruits from a small thorny tree in the citrus family known as prickly ash, according to Karen Shimizu (Saveur, March 2013).  Shimizu adds that Sichuan peppercorns are responsible for the buzzing, tingling sensation that is one of Sichuan cuisine’s most distinguished characteristics.  So you get the tingling from the Sichuan peppercorns, and the spiciness from the chile.  Because they affect different systems of our nerves, we get dual sensations when eating Sichuanese food.  It’s kind of like getting a punch and a kick!
So after having made it and letting it steep overnight, I couldn’t wait to pour it over my fried fish and steamed rice.  I used only the oil like the recipe said.  I did get the punch and the kick – but it was not as strong as I had imagined.  I guess I was expecting it to be a condiment like my regular Hot Chile Oil (Heat 1 cup of peanut oil to 225° - 240°F, remove from heat, dump 1 cup of crushed peppers.), but it wasn’t.  As the recipes in Saveur indicate, Hong You is used to cook food.
While I am still a little disappointed with the not-so-spicy Hong You as a condiment, I do have it to cook with.  I am looking forward to using it in Stir-fried Pork Belly with Chinese Chives or Triple-Cooked Spareribs with Chiles!
Have you ever tried a recipe and it was not what you were expecting?  What did you do with it?


Monday, September 2, 2013

Lemon Chicken

Pounded chicken tenderloin ready to be dredged in flour, salt and pepper.

Sauteing chicken tenderloins.


Lemon slices and capers sautéing in butter.


Lemon Chicken


Lemon Chicken with Linguini


Several years ago my friend Cynthia and I went to an Italian restaurant for dinner. I can’t remember the name of the restaurant or what she ordered. What I do remember is the simple but delicious dish I ordered.

As soon as I tasted my food that night I fell in love with the simplicity and taste of this dish. I had to have it again! Armed with just a memory of how it tasted I set about to recreate it. This has since become one of my daughter’s favorite.


Lemon Chicken with Linguini

Ingredients:

2 ½ lbs chicken tenderloins
2 C flour
1 teaspoon salt
1 teaspoon pepper
¼ - ½ C olive oil
5 tablespoons butter, divided
3 lemons, sliced cross-wise into ¼” discs, divided
2 tablespoons capers
½ teaspoon minced garlic
1 lb linguini cooked according to package directions, reserving 1 cup of cooking water
¼ C minced Italian parsley (optional)


Directions:

1. Wash chicken tenderloins then pat dry. Place 3 inside a plastic bag. Place plastic bag on top of chopping board. Gently pound tenderloins with a rolling pin or small frying pan until they are ¼” thick. Be careful to keep them intact. Continue with the rest of the tenderloins.

2. Heat oil in skillet on medium heat.

3. Combine flour, salt and pepper in a shallow dish. Dredge tenderloins in the flour and shake off excess. Saute tenderloins until they are pale to golden brown. Continue to saute in batches and set aside.

4. In same skillet, add 2 tablespoons butter and sauté half of the lemon slices and half of the capers, about 3 minutes. Using wooden spoon gently mash lemon pulp from the slices to express juice. Add cooked tenderloins and stir gently to coat, about 3 minutes. Transfer to platter and keep them warm.

5. Wipe skillet with a paper towel then add garlic, remaining butter, lemon slices and capers. Saute about 3 minutes, gently mashing lemon pulp to express juice. Add cooked pasta and gently toss to coat. Add ¾ cup pasta cooking water to create a thin sauce. Add more if pasta seems dry or if you want more sauce. Toss to coat again.

6. Serve pasta and chicken tenderloins together. Garnish with minced Italian parsley.

******************


I use chicken tenderloins because it is more delicate and easier to pound. That said, care is needed from pounding too hard. We are trying to make a chicken cutlet, not chicken tenders! Remember, the meat must remain intact. 

“Cooking water” refers to the water the pasta is cooking in. When the pasta has finished cooking, reserve a cup of the water and set aside. And then drain the pasta into a colander. Why? The cooking water contains starch and salt (provided you added salt in the first place, and which is highly recommended). This cooking water will help to emulsify and bind your sauce, or help to thin your sauce. In our Lemon Chicken dish, the cooking water will emulsify our sauce by binding with the oil and butter to create a silky coating for the pasta. It is better than plain water because it contains starch which acts as a thickener. You may use any kind of pasta you want.

Notice that I did not say to add salt to the dish. This is because there is salt in the flour mixture, salt in the butter, lots of salt in the capers, and salt in the cooking water. Of course you may add salt if you wish.

Speaking of capers, what are capers? According to Huffington Post, tiny capers are picked from a shrub-like bush (Capparis spinosa), long before the buds ever flower. The capers are then dried in the sun and later brined or packed in salt. Sometimes capers are allowed to mature to a fruit about the size of an olive. These are sold as caper berries and are brined to be eaten like pickles or olives. It's quite common to see them included in an antipasti platter. Capers aren't new to the culinary scene -- they've actually been around since ancient times. They're grown in parts of Asia, the Middle East and the Mediterranean region, including north Africa, southern Europe and Turkey. Capers are also grown in California.

Why add butter to oil? Simply because it adds luxuriousness to the dish. 

What restaurant dish have you recreated at home?